

How Much Does It Usually Cost to Fix a Car Window? A Complete Guide
Understanding Car Window Repair Costs: What Factors Influence Pricing
When a driver discovers a cracked windshield or a malfunctioning power window, the first question is often “how much will this cost?” The answer depends on a blend of technical, material, and situational factors. Understanding these variables helps vehicle owners anticipate expenses and choose the most cost‑effective solution.
Material type is a primary driver of price. Most modern cars use tempered glass for side windows and laminated glass for windshields. Laminated glass—comprised of two layers of glass bonded with a polyvinyl butyral (PVB) interlayer—offers higher safety standards but also costs more to replace. Tempered glass, while still strong, is cheaper to produce, so side‑window replacements typically run lower than full windshield jobs. In addition, specialty coatings such as acoustic or UV‑blocking layers add a premium, often ranging from 10‑20 % of the base price.
Labor complexity varies with the window’s location and function. A simple manual crank window can be removed and installed in a short time, whereas an electronic power‑window module may require disassembly of door panels, recalibration of sensors, and programming of the vehicle’s control unit. Technicians must also address any water intrusion or seal damage that often accompanies a broken pane. The more steps involved, the higher the labor rate—usually measured in hourly increments that differ between independent shops and dealership service centers.
Vehicle make, model, and year shape both parts and labor costs. Luxury or low‑volume models often use custom‑shaped glass or proprietary mounting hardware, which can be significantly pricier than the standardized panels found on mass‑produced sedans. Older vehicles sometimes benefit from a wider supply of aftermarket glass, reducing parts costs, but they may also lack modern design features that simplify installation, leading to longer labor times.
The extent of damage is another key factor. A small chip in a windshield might be repairable with a resin fill for as little as (50‑)100, extending the life of the original glass. In contrast, a full‑size crack that stretches across the windshield typically necessitates a complete replacement. Side‑window damage that compromises the regulator (the mechanism that raises and lowers the glass) often requires replacement of both the glass and the hardware, inflating the total bill.
Geographic location influences pricing through regional labor rates and parts availability. Urban centers with higher cost‑of‑living indices generally charge more per hour, while rural areas may have lower labor costs but limited access to OEM (original equipment manufacturer) glass, prompting reliance on aftermarket alternatives. Seasonal demand also plays a role; winter storms can surge the need for windshield replacements, sometimes leading to temporary price spikes.
Warranty and insurance coverage can offset out‑of‑pocket expenses, but the presence of a deductible, policy limits, and the insurer’s preference for OEM or aftermarket parts all affect the final amount the driver pays. Many insurers waive deductibles for windshield repairs that restore visibility, encouraging owners to choose a repair over a replacement when feasible.
Additional services, such as recalibrating advanced driver‑assistance systems (ADAS) after a windshield swap, add to the total. Modern vehicles often house cameras and sensors behind the glass; reinstalling the windshield without proper alignment can compromise lane‑keep assist, automatic emergency braking, or rain‑sensing wipers. Technicians must use specialized equipment to certify that these systems function correctly, a service that can add (100‑)250 to the bill.
By weighing these elements—glass type, labor intensity, vehicle specifics, damage scope, location, insurance terms, and any supplemental calibrations—car owners gain a clearer picture of why quotes may differ from shop to shop. Recognizing the underlying reasons equips drivers to ask informed questions, compare estimates wisely, and ultimately make a decision that balances safety with budget considerations.
Next, we will break down the typical price range for the most common window repairs, helping readers see where their specific issue fits within industry norms.
Breaking Down the Typical Price Range for Different Types of Window Repairs
Breaking Down the Typical Price Range for Different Types of Window Repairs
Car owners quickly discover that not every window issue carries the same price tag. The variation stems from the type of glass, the complexity of the mechanism, and whether the repair involves a simple seal or a full panel replacement. Below is a practical look at the most common repair scenarios and the cost bands they usually fall into.
Windshield chips and small cracks. When a chip or a short crack (usually under six inches) is addressed promptly, most auto glass shops can perform a resin injection or a patch. The labor is minimal, and the material cost is low. In practice, drivers can expect to pay (50 – )150 for a professional fix. Some insurers cover the full amount if no deductible is required, which is why many customers choose to have the damage repaired within a few weeks of noticing it.
Medium-sized cracks (six to twelve inches). A larger crack that spans more of the windshield often requires a full pane replacement rather than a simple fill. The price jump reflects the need for a new laminated glass panel, which incorporates a layer of polyvinyl butyral (PVB) for added strength. Typical expenses range from (200 – )500, depending on the vehicle’s make and the availability of OEM (original equipment manufacturer) glass. Independent shops may offer lower prices, but the fit and finish can vary, so it is wise to compare a few quotes.
Complete windshield replacement. Full windshield swaps are the most expensive single‑glass service because they combine parts, labor, and precise calibration of driver‑assist systems such as lane‑keeping assist or rain sensors. For most midsize sedans, the total cost sits between (300 – )800. Luxury models, especially those with heated or acoustic glass, can push the price up to (1,000–)1,500. Many manufacturers now require that the replacement glass meet specific safety standards, which can also affect the final bill.
Side window repairs (driver or passenger door). Side windows differ from windshields in that they typically use tempered glass, which shatters into small, blunt pieces to reduce the risk of injury. A crack that does not compromise the entire pane can sometimes be repaired with a specialized adhesive, keeping costs around (100 – )250. However, most side‑window damage ultimately requires a full panel swap, especially when the frame or latch is affected. In those cases, labor and glass together usually cost (200 – )600, with higher-end vehicles again approaching the upper end of the range.
Rear window (back glass) replacement. The rear glass is often a single piece of tempered or laminated glass that may include a defroster grid. Because the rear window is less likely to contain advanced sensors, the price range is generally tighter than for windshields. Drivers typically see (150 – )400 for a standard replacement, while models with integrated heating or acoustic features can climb to (600 – )900.
Power‑window motor or regulator failure. When the glass itself is intact but the mechanism that raises and lowers it malfunctions, the repair shifts from glass to electromechanical components. A motor replacement for a single door often costs (150–)350, including parts and labor. If the regulator—the set of cables and tracks that guide the window—needs attention, the price can rise to (250 – )500. These figures are useful for budgeting because the labor time is predictable, typically ranging from 1 to 3 hours.
Full‑module assembly (glass plus motor and regulator). In severe cases, such as water damage or a total loss of the window assembly, the most efficient solution is to replace the entire module. This comprehensive approach can streamline the repair but also carries the highest price tag, typically (500 – )1,200 for most passenger cars. Luxury SUVs and trucks may exceed $1,500 due to the larger glass size and more complex electronic integration.
“Choosing a reputable installer matters as much as the price. Proper calibration of any driver‑assist sensors after a windshield swap can prevent costly safety issues down the road.”
Transitioning from these cost ranges, the next logical factor to consider is how a vehicle’s make, model, and year influence the final budget. Different manufacturers design their glass and mounting systems uniquely, and those variations will shape the estimates a shopper receives.
How Vehicle Make, Model, and Year Impact Your Window Replacement Budget
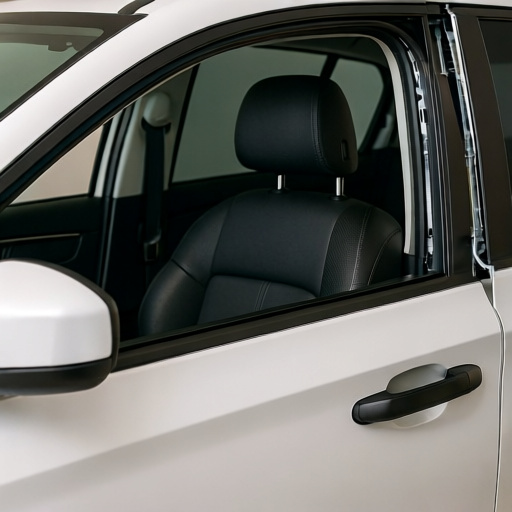
When the price tag for a car‑window repair varies dramatically from one garage to another, the culprit is often the vehicle itself. The make, model, and production year dictate not only the part price but also the labor intensity, tooling requirements, and availability of genuine components. Understanding these variables helps owners anticipate how their specific car will influence the overall budget.
Make matters most because manufacturers design their glass systems differently. Luxury brands such as Mercedes‑Benz, BMW, and Audi typically use thicker, laminated panes with integrated heating elements and built‑in defrost sensors. Those features add both material cost and extra steps for technicians. In contrast, mainstream makes like Ford, Chevrolet, and Toyota often employ simpler stamped glass that can be swapped without removing additional electronics. As a result, a window for a high‑end sedan can cost two to three times as much as the same size piece for an economy compact.
The model refines the picture further. Even within a single make, certain models are engineered with unique window mechanisms. A coupe with a frameless roof often requires a door panel that incorporates the window seal, making the assembly heavier and more complex to disassemble. Likewise, SUVs with sliding or panoramic roofs involve larger glass panels and sometimes motorized tracks. These design nuances affect labor hours: a standard passenger‑car side window may require 1.5 hours of work, while a panoramic roof replacement can require 3 hours or more, effectively doubling the labor component of the bill.
The year of manufacture introduces the element of parts availability. Early‑generation vehicles (typically the first few years after a model launch) may still be in the “new‑part” phase, where OEM (original equipment manufacturer) glass is produced in limited batches. Scarcity drives up the price, and some shops may need to order the part from a remote distribution center, adding shipping fees and lead time. As a model ages, aftermarket alternatives become more common, often offering a cheaper—but still reliable—option. However, very old vehicles (15 years or more) sometimes have only salvaged glass available, which can be less expensive but carries a risk of reduced structural integrity.
Practical implications for budgeting
Luxury vs. non‑luxury: Expect a base price of (200–)300 for a standard window on a budget brand, while a comparable window on a premium brand can start at (400 and climb beyond )800 when heated or acoustic features are included.
Special body styles: Models with panoramic or sliding roofs may add (150–)250 in labor due to extra disassembly and re‑calibration of sensors.
Age‑related availability: Newer cars (0‑5 years) often have OEM parts priced at a premium; older cars (10‑15 years) may benefit from lower‑cost aftermarket or used glass, but you might need to budget for additional sealant or reinforcement work.
Tips to control costs based on your vehicle
Ask for part numbers – Knowing the exact OEM part number lets you compare prices across suppliers, including reputable online retailers that sometimes undercut local shops.
Consider aftermarket options – For non‑safety‑critical windows (e.g., rear side windows), quality aftermarket glass can shave 20‑30 % off the part cost without compromising fit.
Plan for sensor recalibration – If your vehicle’s window includes defrost or rain‑sensing sensors, request a bundled labor quote that includes any required electronic re‑programming. Ignoring this step later can lead to hidden fees.
Leverage warranties – Some manufacturers offer a limited warranty on replacement glass for a set mileage or time period. Verifying coverage before purchasing can prevent future out‑of‑pocket expenses.
Transitioning from these make‑model considerations, the next logical step is learning how to obtain accurate quotes and spot hidden fees. By aligning expectations with your car’s specific characteristics, you’ll enter the quoting process with a clearer sense of what a fair price looks like.
Step-by-Step Guide to Getting Accurate Quotes and Avoiding Hidden Fees
Step‑by‑Step Guide to Getting Accurate Quotes and Avoiding Hidden Fees
When a driver decides that a cracked or non‑functioning window needs fixing, the first instinct is often to call the nearest shop and ask for a price. A quick estimate can be useful, but without a clear process, it’s easy to end up with surprise charges later. This guide walks readers through a systematic approach that minimizes guesswork, highlights the most common hidden fees, and equips them to negotiate confidently.
1. Gather Core Details Before You Call
Vehicle specifics: make, model, year, and trim level. Even a minor trim difference can change the type of glass or electronics required.
Window type – Driver’s side, passenger side, rear, or sunroof each has distinct mechanisms.
Symptom description – Is the glass cracked, the regulator stuck, or the power window motor dead? The more precise the description, the more accurate the quote.
Having these facts on hand prevents the shop from “guessing” and adding unnecessary parts to the estimate.
2. Request a Written Breakdown
Ask the service center to email or text a line‑item quote. A credible shop will separate labor, parts, and any additional fees. Look for:
Parts cost – OEM (original equipment manufacturer) versus aftermarket pricing. OEM parts are usually higher but may be required for newer vehicles with integrated sensors.
Labor hours – Most window replacements take between 1 and 2 hours; a shop should state an hourly rate and total hours.
Environmental or disposal fees – Some shops add a flat “glass disposal” charge; verify its necessity.
Markup – Retail shops often apply a markup on parts. Compare the listed part price with an online price check to gauge fairness.
A written quote creates a reference point for later discussions and helps spot any items that seem inflated.
3. Cross‑Check Prices Independently
The internet provides a quick sanity check. Look up the part price on reputable automotive retailers or the manufacturer’s website. For labor rates, a national average of (80‑)120 per hour is common, but local market rates can vary. If a shop’s labor estimate exceeds the typical range by a large margin, ask them to explain why—complexity, specialized tools, or certification may be valid reasons.
4. Identify Common Hidden Fees and Ask to Eliminate Them
Hidden fees often appear under vague headings such as “shop supplies” or “miscellaneous.” Typical culprits include:
Shop‑supplies surcharge – A flat percentage added to the total. Many shops will waive it if the customer requests a detailed parts list.
Diagnostic fee – Some shops charge a fee to “diagnose” a window issue even after the problem is already known. Clarify whether the fee is necessary for your repair.
Mileage or travel surcharge – Mobile repair services sometimes add a per‑mile charge. If you’re willing to bring the car in, you can avoid this cost.
When the quote arrives, scan for these items and call the shop to request their removal or clarification. A professional shop should be willing to adjust the estimate rather than hide fees.
5. Verify Warranty Coverage
Many window repairs come with a limited warranty on parts and labor. Ask the shop to include the warranty terms in writing. If the repair is covered under a manufacturer’s warranty, you may not need to pay for parts at all. Conversely, a shop‑offered warranty that extends beyond the manufacturer’s standard period can be valuable, but confirm the cost‑benefit ratio before agreeing.
6. Compare Multiple Quotes
Collect at least three estimates from different sources—dealership service bays, independent auto shops, and specialty glass technicians. Use a simple comparison table (handwritten or digital) to line up parts, labor, taxes, and extra fees. The lowest total cost isn’t always the best choice; factor in reputation, turnaround time, and warranty coverage.
7. Confirm the Final Estimate Before Work Begins
Once you have selected a shop, request a final, itemized estimate that reflects any negotiated discounts or removed fees. Sign only after reviewing this document. A clear “total price” figure should match the earlier written quote, and any changes after work starts must be communicated and approved.
8. Keep Documentation for Future Reference
Retain the written quote, the final invoice, and any warranty paperwork. Should a dispute arise—such as an unexpected charge on the final bill—having the original documents makes resolution straightforward. Moreover, future buyers or insurance adjusters can benefit from this record if the window issue recurs.
By following these eight steps, drivers can navigate the quoting process with confidence, avoid common hidden fees, and ensure that the price they pay truly reflects the work required. The next section will explore whether tackling a simple window repair yourself might yield additional savings, and when professional help remains the safest option.
DIY vs. Professional Repair: Cost Savings, Risks, and When to Choose Each

Transitioning from the quote‑gathering process, many car owners wonder whether tackling a window problem themselves will truly pay off. The answer depends on the balance between potential savings, the skill required, and the long‑term reliability of the repair. Below is a practical comparison that helps readers decide when a do‑it‑yourself (DIY) approach makes sense and when calling a certified technician is the safer bet.
What DIY Can Save You
Labor costs – Professional shops typically charge (70 – )120 per hour. Performing the work at home eliminates this expense.
Markup on parts – Dealerships and independent garages often add 20‑30 % to the list price of window regulators, seals, or glass. Purchasing the component directly from a reputable supplier can reduce that cost dramatically.
Control over timing – With a DIY project, the owner decides when to start and finish, which can be valuable during long shop wait times.
These savings are most pronounced for simple glass‑only replacements, such as a cracked passenger side window where the regulator is still functional. In that scenario, a DIYer who follows a step‑by‑step guide can often complete the job for under (150, compared with )300‑$500 quoted by a shop.
Risks of Going Solo
Even modest savings can be offset by hidden hazards. The most common pitfalls include:
Improper sealing – Failing to reinstall the weather‑strip correctly invites water intrusion, which can lead to rust or electrical shorts.
Damaged wiring – Modern windows are integrated with power‑window motors and anti‑pinch sensors. Accidental cuts to the harness may cause intermittent operation or trigger dashboard warnings.
Void warranties – Many manufacturers stipulate that window repairs be performed by authorized service centers. A DIY fix could nullify a remaining warranty, costing more in the long run.
Because the repair often involves delicate clips, calibrated torque settings, and sometimes calibrated motor controllers, an inexperienced hand may need to redo the work or replace additional components, erasing any initial savings.
When Professional Help Is Worth the Extra Cost
Regulator or motor failure – If the window motor or regulator is faulty, the repair requires precise torque specifications and sometimes factory‑specific tools. Certified technicians have access to these resources and can guarantee proper re‑calibration.
Integrated safety systems – Vehicles equipped with anti‑pinch sensors or lane‑keeping assist may need a diagnostic scan after a window swap. A shop can run the required software checks to ensure the system functions correctly.
Complex glass types – Heated or acoustic glass incorporates wiring within the pane itself. Replacing such glass without professional equipment can cause short circuits or uneven heating.
In these cases, the cost difference narrows. A professional repair that includes a diagnostic scan and a parts warranty may cost (350–)650, but the peace of mind and adherence to safety standards often justify the expense.
A Practical Decision Framework
Assess the problem – Is it a clean break in the glass, or does the motor also struggle?
Check warranty status – If the vehicle is still under a power‑window warranty, a dealer repair is usually the safest route.
Consider tools and expertise – Do you own a torque wrench, a set of interior trim removal tools, and a reputable service manual? If not, borrowing or renting them may add hidden costs.
Estimate the total expense – add the cost of parts, any necessary tools, and the value of your time. Compare this sum to the lowest professional quote you received after the quote‑gathering step.
If the DIY route saves at least 30 % after accounting for tools and potential re‑work, and the repair is limited to glass replacement, many owners choose the hands‑on approach. Otherwise, opting for a certified shop reduces the likelihood of future headaches.
Quick Tips for a Successful DIY Window Replacement
Watch a reputable video tutorial – Visual guidance reduces the chance of missing a clip or overtightening a bolt.
Label all fasteners – Keeping a small container with labeled screws helps during reassembly.
Test the motor before closing the door – temporarily connect power to verify the window moves smoothly before final sealing.
By following these precautions, the DIY enthusiast can enjoy the cost benefits without compromising vehicle safety.
As readers weigh the options, the next section will explore advanced techniques for cutting expenses even further—such as sourcing refurbished components and negotiating with local shops—while still maintaining high repair quality.
Advanced Tips for Reducing Repair Expenses Without Compromising Quality
When it comes to fixing a car window, savvy owners know that cost‑saving measures can coexist with high‑quality outcomes. Below are practical strategies that keep the repair budget in check while preserving the integrity of the vehicle’s glass system.
Choose the Right Parts Supplier
OEM versus aftermarket – Original Equipment Manufacturer (OEM) glass guarantees a perfect fit and factory‑approved performance, but many reputable aftermarket options meet the same safety standards at a lower price. Compare certifications and read reviews to ensure the alternative part matches the vehicle’s specifications.
Bulk‑purchase discounts – If a driver anticipates multiple repairs (for example, a side window and a rear glass), purchasing both pieces from the same supplier often unlocks volume discounts.
Local inventory checks – Call nearby auto parts stores before ordering online. A nearby stock may eliminate shipping fees and reduce lead time, especially for common window sizes.
Leverage Warranty Coverage
Even when a repair is not covered by the vehicle’s original warranty, several other protections may apply. Extended service contracts, credit‑card purchase protections, and even certain homeowner’s insurance policies can reimburse part of the cost if the damage results from a covered event such as vandalism or a storm. Reviewing policy language before a repair begins helps avoid unnecessary out‑of‑pocket expenses.
Optimize Labor Costs
Schedule during off‑peak hours – Shops often experience slower periods on weekday mornings. Booking an appointment then can lead to lower labor rates or promotional discounts.
Combine services – If the vehicle already needs brake or suspension work, ask the shop to bundle the window repair with the other service. Technicians can often perform multiple tasks in a single session, reducing overall labor time.
Ask about flat‑rate pricing – Some shops quote a flat fee for a specific window replacement, which can protect the customer from variable hourly charges. Clarify what the flat rate includes—such as sealant and disposal—to avoid hidden fees later.
Perform Simple Preventive Tasks
Maintaining the window system reduces the likelihood of costly repairs. A quick daily check for cracks, chips, or water intrusion lets owners address minor issues before they spread. Using a UV‑protective windshield cover at night shields the glass from temperature‑related stress, extending its lifespan.
“A small chip that’s sealed within 24 hours often prevents a full‑pane replacement later,” notes a veteran auto‑glass technician.
DIY Minor Repairs When Safe
For those comfortable with basic tools, sealing a minor chip or replacing a worn window seal can be done at home. DIY kits are widely available and include clear epoxy, sandpaper, and step‑by‑step instructions. The key is to follow safety precautions: disconnect the battery, wear protective gloves, and ensure the work area is clean. When in doubt, a brief consultation with a professional can confirm whether the DIY approach is appropriate.
Seek Competitive Quotes
Even after the previous sections, gathering multiple estimates remains essential. Use a spreadsheet to track each quote’s line items—parts, labor, taxes, and any additional fees. Identify outliers and ask the shops to justify higher charges. Often, a shop will match a competitor’s price when presented with a lower quote, especially if the customer signals intent to choose another provider.
Embrace Technology
Many reputable auto‑glass shops now provide online diagnostics and virtual appointments. By uploading photos of the damaged window, a technician can diagnose the problem and propose a repair plan before any physical visit. This pre‑screening can eliminate unnecessary travel and reduce the number of on‑site labor hours billed.
Prepare for Future Repairs
Finally, building a small “car‑maintenance fund” helps smooth out occasional, unplanned expenses. Allocating a modest monthly amount—say, (20 to )30—creates a buffer that makes the next window repair less stressful financially. Over time, the saved funds can cover the cost of a full replacement without requiring a high‑interest loan or a credit card charge.
By integrating these tactics—smart parts sourcing, strategic scheduling, preventative habits, and informed negotiations—car owners can keep repair costs reasonable while still delivering the quality and safety that a properly functioning window demands. The next section will explore common mistakes that often inflate repair bills and how to steer clear of them.
Common Mistakes That Can Inflate Your Car Window Repair Bill and How to Prevent Them

When car owners try to save a few dollars, they often overlook simple errors that end up costing far more. Understanding these pitfalls helps keep the invoice realistic and avoids surprise fees.
Mistake #1 – Skipping the Diagnostic Fee Many shops charge a nominal diagnostic fee before any work begins. Customers who decline this step to “save money” may later be billed for repeated inspections when the problem re‑appears. Prevent: Agree to a one‑time diagnostic charge and ask the mechanic to provide a written report of the findings. This documentation makes it easier to compare estimates and prevents duplicate testing.
Mistake #2 – Using the Wrong Glass Type OEM (original equipment manufacturer) glass matches the vehicle’s specifications for thickness, tint, and safety standards. Substituting aftermarket glass without confirming compatibility can lead to poor fit, water leaks, or the need for additional adjustments. Prevent: Verify that the replacement glass matches the VIN‑specified part number. If a cheaper, non‑OEM option is preferred, request a clear warranty statement that covers fit‑related issues.
Mistake #3 – Ignoring Electrical System Checks Modern windows rely on motors, sensors, and control modules. A common oversight is replacing only the glass while leaving a faulty regulator or motor untouched. The repair shop may later discover that the underlying electrical component failed, adding an unexpected labor charge. Prevent: Ask the technician to inspect the entire window assembly—including motor, regulator, and wiring—before authorizing the glass swap. A comprehensive check often reveals hidden problems early, saving time and money.
Mistake #4 – Accepting Unnecessary “Full‑Service” Packages: Some shops bundle glass replacement with unrelated services, such as interior detailing or coolant flushes. While the package may look convenient, the added items are rarely needed for a simple window repair. Prevent: Request an itemized estimate that separates the window work from any ancillary services. Decline any add‑ons that you do not plan to use.
Mistake #5 – Failing to Secure a Written Warranty. A verbal guarantee that “the work will be good” is easy to forget. Without a written warranty, any later defect may be billed as a new repair. Prevent: Ensure the shop provides a written warranty covering both parts and labor. Note the warranty duration and conditions, and keep a copy with your service records.
Mistake #6 – Delaying Repairs After a Crack Appears. A small chip or crack can spread quickly, especially under temperature fluctuations. Waiting for the crack to grow often means the entire pane must be replaced rather than a simple repair, which dramatically raises the cost. Prevent: Schedule a repair as soon as damage is noticed. Early intervention often allows glass repair rather than full replacement, reducing both parts and labor costs.
Mistake #7 – Choosing the Cheapest Labor Rate Without Vetting Experience. Labor rates vary widely, but the lowest price does not always equal the best value. Technicians with insufficient experience may take longer, make errors, or use improper sealing techniques that lead to leaks later. Prevent: Research the shop’s reputation, read reviews, and confirm that technicians are certified for your vehicle’s make and model. A modestly higher hourly rate often translates into faster, higher‑quality work.
“A transparent estimate and a clear explanation of each line item are the best tools a customer has to avoid surprise costs,” notes an industry veteran who has overseen repairs at several major auto service centers.
By recognizing these common mistakes, car owners can navigate the repair process with confidence. The next section will explore proactive maintenance habits that keep windows in good shape and further reduce future expenses.
Future-Proofing Your Budget: Maintenance Practices to Minimize Future Costs
A proactive approach to window upkeep can turn a potentially expensive repair into a routine, low‑cost task. By treating the power‑window system as a set of interrelated components—glass, regulator, motor, switches, and seals—owners can spot early wear and intervene before a failure escalates into a full replacement.
Inspect seals and glass regularly. Every month, a quick visual check of the rubber weatherstripping around each window reveals cracks, gaps, or hardening. When seals dry out, water can enter the door cavity, causing the regulator to rust or electrical connections to corrode. A simple wipe‑down with a silicone‑based protectant restores flexibility and adds a moisture barrier, extending seal life by months.
Keep moving parts lubricated. The window regulator—whether a cable‑pulley or gear‑driven assembly—relies on smooth motion. Over time, dust and debris accumulate, creating friction that strains the motor. Using a lightweight, non‑conductive grease (such as lithium‑based spray) on the regulator’s pivot points once a year keeps the mechanism quiet and reduces motor load. This preventive step often averts the common “slow‑moving” symptom that signals a costly motor replacement.
Watch for electrical warning signs. A window that hesitates, stutters, or requires multiple button presses is often an early electrical issue. Checking the battery voltage (should be around 12.6 V with the engine off) and confirming that the connector plugs are clean and tight can resolve many problems without opening the door panel. If a fuse repeatedly blows, replace it with the same amperage rating and inspect the wiring for abrasion—addressing these issues early prevents the motor from burning out.
Maintain a clean interior environment. Leaves, sand, and road salt can be blown into the door cavity when windows are opened on dusty roads. Periodically vacuuming the interior side of the door and wiping the glass edges with a mild cleaner removes abrasive particles that would otherwise grind against the regulator. This habit not only protects the glass but also reduces wear on the motor’s gears.
Adopt gentle operation habits. Rough handling—such as slamming windows shut or forcing them open against resistance—places unnecessary stress on the regulator and motor. Encouraging all drivers to use steady, moderate pressure when operating windows helps preserve the system’s lifespan. In vehicles equipped with auto‑up/down features, setting the “soft‑close” option (when available) further softens the mechanical impact.
Schedule seasonal checks. Temperature extremes affect rubber seals and electronic components. Before winter, apply a silicone sealant to any visible gaps and verify that the window’s drainage holes (usually found at the bottom of the door) are clear of debris. In summer, ensure the interior glass does not develop condensation, which can indicate a seal leak. Seasonal inspections create a checklist that fits naturally into routine vehicle maintenance.
Leverage professional diagnostics sparingly. If a window exhibits intermittent issues, a quick diagnostic scan at a reputable shop can pinpoint a failing sensor or weak motor circuit. Investing in a targeted scan—rather than waiting for a total failure—often costs a fraction of the cost of a full replacement. Documenting the diagnostic code also provides a reference point for future repairs, potentially saving on labor if the same issue recurs.
By integrating these simple practices into regular vehicle care, drivers can significantly lower the likelihood of unexpected, high‑ticket window repairs. The effort required—a few minutes each month—pays off in reduced downtime, fewer emergency visits to the shop, and a more predictable maintenance budget.
Frequently Asked Questions
What factors most affect the cost of a car window repair?
The cost is influenced by the type of glass, the complexity of the mechanism, the vehicle’s make, model, and year, and whether the job requires a simple seal fix or a full panel replacement.
How can I get an accurate quote and avoid hidden fees?
Request a detailed written estimate that breaks down parts, labor, and any additional charges, compare multiple shops, and ask specifically about disposal, shop fees, and warranty coverage before authorizing work.
When is it better to DIY a window repair rather than hire a professional?
DIY can save money for minor seal or small chip repairs if you have the right tools and experience, but for cracked windshields, power‑window mechanisms, or complex replacements, professional service reduces the risk of further damage and ensures safety.
Can choosing aftermarket parts lower my repair bill without sacrificing quality?
Aftermarket glass often costs less than OEM, but quality varies; select reputable suppliers with good reviews and ensure the parts meet safety standards to avoid compromising durability or warranty.
What routine maintenance can prevent expensive future window repairs?
Regularly inspect seals, clean tracks, lubricate moving parts, and promptly address small chips; this early care helps catch wear before it leads to motor failure or full glass replacement.





No comment yet, add your voice below!